 RuyiSDK Board Docs
第9章:Gazebo 仿真
课程:ROS2 C++17 编程(COM260 Kit)
章节:第9章
课时:2 课时(90 分钟)
教学方式:讲授 + 演示
9.1 Gazebo 仿真环境概述
知识点 9.1.1:Gazebo 版本选择
| 特性 | Gazebo Classic (11) | Gazebo Sim (Ignition) |
|---|---|---|
| ROS2 支持 | gazebo_ros_pkgs | ros_gz |
| 本课程角色 | 原版示例背景 | COM260 版使用 Humble + Harmonic |
| 稳定性 | 成熟稳定 | 积极开发中 |
本章在 x86 Humble 容器中运行 Gazebo Sim Harmonic,在 COM260 运行 C++17 传感器订阅。Humble 对应的 Harmonic 控制插件从固定官方源码构建;准备步骤见第 9 章实验。
知识点 9.1.2:URDF → SDF 转换桥
# Gazebo 使用 SDF 模型;本章由 Launch 分别加载 SDF 与机器人 TF 的 URDF
# 使用教案的 360° 激光配置
ros2 launch sim_demo sim_bringup.launch.py sensor_profile:=teacher
Gazebo 使用 SDF 表达仿真模型,ros_gz_sim create 加载模型;robot_state_publisher 使用 URDF 发布机器人 TF。
知识点 9.1.3:官方要点——Gazebo 与 ROS 2 集成架构
官方 Gazebo Simulator 教程(Advanced/Simulators 分类)概述了 Gazebo 的两大版本与对应的 ROS 2 集成包:经典 Gazebo Classic(11.x,对应 gazebo_ros_pkgs)与新代 Gazebo(Ignition/Gz sim,对应 ros_gz 系列包)。本章使用的 ros_gz 属于后者,其架构为「Gazebo 物理引擎 + ROS 2 桥接层」:仿真世界运行在 Gazebo 进程中,ROS 2 侧通过桥接插件收发话题与服务。官方教程以 turtlesim 之外的差速小车为例,演示了 ros_gz_bridge/gazebo_ros 双向桥接的启动方式,与本章 9.1.2 节的集成原理一一对应。
The Construct 的课程强调版本配对的重要性:ROS 2 Humble 的默认 Gazebo Sim 配对为 Fortress;本课程沿用已经建立的 Harmonic 环境,混用不同代际的插件会直接报「未找到插件库」错误,实验前应先核对 package.xml 中的仿真依赖。
9.2 Spawn 机器人模型
知识点 9.2.1:Gazebo 启动 Launch 文件
"""Chapter 9 Burger simulation with real ros2_control and Gazebo Harmonic sensors."""
import os
from pathlib import Path

from ament_index_python.packages import get_package_share_directory
from launch import LaunchDescription
from launch.actions import DeclareLaunchArgument, ExecuteProcess, OpaqueFunction, SetEnvironmentVariable, TimerAction
from launch.conditions import IfCondition, UnlessCondition
from launch.substitutions import LaunchConfiguration
from launch_ros.actions import Node
from launch_ros.parameter_descriptions import ParameterValue


def start_simulation(context):
    share = Path(get_package_share_directory('sim_demo'))
    assets = Path(get_package_share_directory('robot_sim_demo'))
    profile = LaunchConfiguration('sensor_profile').perform(context)
    if profile not in ('lab', 'teacher'):
        raise ValueError('sensor_profile must be lab or teacher')
    sdf = (share / 'models' / f'burger_{profile}.sdf').read_text()
    sdf = sdf.replace('@CONTROLLERS_FILE@', str(share / 'config' / 'diff_drive.yaml'))
    description = (share / 'urdf' / 'burger_control.urdf').read_text()
    world = LaunchConfiguration('world')
    sim_time = ParameterValue(LaunchConfiguration('use_sim_time'), value_type=bool)
    return [
        SetEnvironmentVariable('GZ_PARTITION', LaunchConfiguration('gz_partition')),
        SetEnvironmentVariable('GZ_SIM_RESOURCE_PATH', str(assets / 'models') + os.pathsep + os.environ.get('GZ_SIM_RESOURCE_PATH', '')),
        ExecuteProcess(cmd=['gz', 'sim', '-r', '--gui-config', LaunchConfiguration('gui_config'), world],
                       output='screen', condition=IfCondition(LaunchConfiguration('gui'))),
        ExecuteProcess(cmd=['gz', 'sim', '-r', '-s', '--headless-rendering', world],
                       output='screen', condition=UnlessCondition(LaunchConfiguration('gui'))),
        Node(package='robot_state_publisher', executable='robot_state_publisher',
             name='robot_state_publisher', output='screen',
             parameters=[{'robot_description': description, 'use_sim_time': sim_time}]),
        Node(package='ros_gz_bridge', executable='parameter_bridge', name='sensor_bridge', output='screen',
             parameters=[{'config_file': str(share / 'config' / 'bridge.yaml'), 'use_sim_time': sim_time}]),
        Node(package='ros_gz_image', executable='image_bridge', name='camera_bridge',
             arguments=['/camera/image_raw'], parameters=[{'use_sim_time': sim_time}]),
        TimerAction(period=3.0, actions=[Node(
            package='ros_gz_sim', executable='create', name='spawn_burger', output='screen',
            arguments=['-world', LaunchConfiguration('world_name'), '-string', sdf,
                       '-name', 'turtlebot3_burger', '-x', LaunchConfiguration('spawn_x'),
                       '-y', LaunchConfiguration('spawn_y'), '-z', LaunchConfiguration('spawn_z'),
                       '-Y', LaunchConfiguration('spawn_yaw')])]),
        Node(package='controller_manager', executable='spawner', output='screen',
             arguments=['joint_state_broadcaster', '--controller-manager-timeout', '60']),
        Node(package='controller_manager', executable='spawner', output='screen',
             arguments=['diff_drive_controller', '--controller-manager-timeout', '60']),
        Node(package='rviz2', executable='rviz2', output='screen',
             arguments=['-d', str(share / 'rviz' / 'sensors.rviz')],
             parameters=[{'use_sim_time': sim_time}], condition=IfCondition(LaunchConfiguration('rviz'))),
    ]


def generate_launch_description():
    share = Path(get_package_share_directory('sim_demo'))
    return LaunchDescription([
        DeclareLaunchArgument('world', default_value=str(share / 'worlds' / 'empty.sdf')),
        DeclareLaunchArgument('world_name', default_value='default'),
        DeclareLaunchArgument('gui', default_value='true'),
        DeclareLaunchArgument('gui_config', default_value=str(Path(get_package_share_directory('robot_sim_demo')) / 'gui' / 'museum.gui.config')),
        DeclareLaunchArgument('rviz', default_value='false'),
        DeclareLaunchArgument('sensor_profile', default_value='lab'),
        DeclareLaunchArgument('use_sim_time', default_value='true'),
        DeclareLaunchArgument('gz_partition', default_value='com260_ch09_ch10'),
        DeclareLaunchArgument('spawn_x', default_value='0.0'),
        DeclareLaunchArgument('spawn_y', default_value='0.0'),
        DeclareLaunchArgument('spawn_z', default_value='0.010'),
        DeclareLaunchArgument('spawn_yaw', default_value='0.0'),
        OpaqueFunction(function=start_simulation),
    ])
程序 9-1:最小 Gazebo 启动文件,通过 ros_gz_sim create 加载机器人。
知识点 9.2.2:官方要点——世界文件与机器人生成
Gazebo 的 SDF 世界文件定义了光照、地面、物理参数与模型列表,9.2 节启动文件中的 empty.sdf(本章也提供 worlds/museum.sdf)即采用该格式。官方教程推荐的工作流是:指定 world:=... 启动仿真器,再由 ros_gz_sim create 把 SDF 模型注入世界;本章 Launch 同时向 robot_state_publisher 提供 URDF,保持传感器 frame 与控制关节一致。
注入后的坐标系规范值得注意:控制器发布 odom → base_footprint,robot_state_publisher 接续 base_link 和传感器帧;Gazebo world 真值通过独立 /ground_truth 话题提供,本章不发布 world → odom,这正是第 7 章 TF 树在仿真中的落地。Articulated Robotics 的教程进一步演示了把「世界文件 + 模型 + Launch」打包为独立仿真包(如 my_robot_gazebo)的组织方式,与仓库中 robot_sim_demo 的包结构一致。
9.3 传感器插件配置
知识点 9.3.1:LiDAR 传感器插件
<sensor name="laser" type="gpu_lidar">
        <always_on>true</always_on>
        <update_rate>8</update_rate>
        <topic>/scan</topic>
        <gz_frame_id>laser_link</gz_frame_id>
        <visualize>true</visualize>
        <ray>
          <scan>
            <horizontal>
              <samples>360</samples>
              <resolution>1</resolution>
              <min_angle>-3.14159</min_angle>
              <max_angle>3.14159</max_angle>
            </horizontal>
          </scan>
          <range>
            <min>0.12</min>
            <max>12.0</max>
            <resolution>0.01</resolution>
          </range>
          <noise>
            <type>gaussian</type>
            <mean>0</mean>
            <stddev>0.002</stddev>
          </noise>
        </ray>
      </sensor>
程序 9-2:LiDAR 插件发布 /scan 话题。
知识点 9.3.2:Camera 传感器插件
<sensor name="front_camera" type="camera">
        <pose>0.020 0 0 0 0 0</pose>
        <always_on>true</always_on>
        <update_rate>4</update_rate>
        <topic>/camera/image_raw</topic>
        <gz_frame_id>camera_optical_frame</gz_frame_id>
        <visualize>true</visualize>
        <camera name="front_camera">
          <horizontal_fov>1.047</horizontal_fov>
          <image>
            <width>640</width>
            <height>480</height>
            <format>R8G8B8</format>
          </image>
          <clip>
            <near>0.05</near>
            <far>8.0</far>
          </clip>
          <camera_info_topic>/camera/camera_info</camera_info_topic>
        </camera>
      </sensor>
知识点 9.3.3:IMU 传感器插件
<sensor name="imu_sensor" type="imu">
        <pose>-0.032 0 0.068 0 0 0</pose>
        <always_on>true</always_on>
        <update_rate>50</update_rate>
        <topic>/imu</topic>
        <gz_frame_id>imu_link</gz_frame_id>
      </sensor>
知识点 9.3.4:官方要点——传感器插件配置要点
本章 9.3 节使用的激光雷达与相机,依赖 Gazebo 侧的传感器插件把仿真数据流发布为 ROS 2 话题。Harmonic 使用 Sensors 和 Imu 系统生成激光、图像、相机信息与 IMU,由 ros_gz Bridge 转成 ROS 消息。轮速和编码器使用 gz_ros2_control 硬件接口;diff_drive_controller 发布 /odom 和底盘 TF,JointStateBroadcaster 发布关节状态。不能同时启用 Gazebo 内置 DiffDrive,否则会出现两个运动控制器。
工程要点有三:其一,插件输出的话题帧名必须与 TF 树一致(如 laser 帧需在 URDF 中真实存在),否则 RViz 中 /scan 无法显示——本章练习 9.6 即可复现该现象;其二,传感器更新频率受 Gazebo 实时因子影响,CPU 负载过高时 ros2 topic hz 会明显低于设定值;其三,图像类话题带宽大,跨机调试建议配合 compress_image 或降分辨率。
9.4 ros2_control 差速驱动
知识点 9.4.1:ros2_control 架构
硬件接口层:GazeboSimSystem (模拟编码器+电机)
    ↓
控制器管理层:diff_drive_controller (速度→左右轮速)
    ↓
ROS2 命令接口:/cmd_vel → 速度指令
知识点 9.4.2:Gazebo ros2_control 插件
<ros2_control name="GazeboSimSystem" type="system">
  <hardware><plugin>gz_ros2_control/GazeboSimSystem</plugin></hardware>
  <joint name="wheel_left_joint">
    <command_interface name="velocity"/>
    <state_interface name="position"/><state_interface name="velocity"/>
  </joint>
  <joint name="wheel_right_joint">
    <command_interface name="velocity"/>
    <state_interface name="position"/><state_interface name="velocity"/>
  </joint>
</ros2_control>

<!-- SDF model 中的插件 -->
<plugin filename="gz_ros2_control-system" name="gz_ros2_control::GazeboSimROS2ControlPlugin">
  <robot_param>robot_description</robot_param>
  <robot_param_node>robot_state_publisher</robot_param_node>
  <parameters>@CONTROLLERS_FILE@</parameters>
  <ros>
    <remapping>/diff_drive_controller/cmd_vel_unstamped:=/cmd_vel</remapping>
    <remapping>/diff_drive_controller/odom:=/odom</remapping>
  </ros>
</plugin>
配套配置 YAML 文件定义控制器参数:
controller_manager:
  ros__parameters:
    update_rate: 50
    use_sim_time: true
    joint_state_broadcaster:
      type: joint_state_broadcaster/JointStateBroadcaster
    diff_drive_controller:
      type: diff_drive_controller/DiffDriveController

diff_drive_controller:
  ros__parameters:
    left_wheel_names: [wheel_left_joint]
    right_wheel_names: [wheel_right_joint]
    wheel_separation: 0.16
    wheel_radius: 0.033
    cmd_vel_timeout: 1.0
    use_stamped_vel: false
    publish_rate: 50.0
    enable_odom_tf: true
    odom_frame_id: odom
    base_frame_id: base_footprint
    position_feedback: true
    open_loop: false
程序 9-3:diff_drive_controller 接收 /cmd_vel,计算左右轮速写入硬件接口。
知识点 9.4.3:官方要点——ros2_control 与差速驱动集成
官方 ros2_control 文档(control.ros.org)与 gz_ros2_control 项目把「控制器框架 + 仿真后端」的分工讲得最清楚:Controller Manager 加载 diff_drive_controller 等通用控制器,硬件接口由 gz_ros2_control 插件代理——它把 Gazebo 的关节状态注入 JointStateBroadcaster、把速度指令下发给仿真物理引擎,使同一套控制器配置在仿真与实机间无缝切换。本章 9.4 节的 diff_drive_controller 配置、YAML 参数文件与 Launch 集成正是该文档流程的中文落地。
配置时的三个常见坑与官方 FAQ 一致:use_sim_time 必须设为 true,否则控制器与仿真时钟失配;robot_state_publisher 未启动会导致 TF 缺失、里程计漂移图异常;控制器未先 spawner 加载就发送 /cmd_vel 会静默丢弃。建议读者按「先 odom 反馈、再 cmd_vel 闭环、最后 RViz 轨迹显示」的顺序逐项验证,把本章练习 9.5 的遥控实验与练习 9.6 的传感器观测串联成完整的仿真闭环。
9.5 本章小结
Gazebo Harmonic 通过 ros_gz_bridge 与 ROS2 通信,由 ros_gz_sim create 加载 SDF;LiDAR、Camera、IMU 配置放在 SDF 传感器元素中。ros2_control 的 diff_drive_controller 根据 Burger 的实际轮距 0.16 m 和轮半径 0.033 m 实现差速控制,控制器参数保存在 YAML。
9.6 练习题
练习 9.1:编写 sim_bringup.launch.py,启动 Gazebo + 空世界 + spawn 机器人。
练习 9.2:在本章 SDF 中添加 LiDAR 传感器配置,发布 /scan 话题。
练习 9.3:在本章 SDF 中添加 Camera 传感器,验证 /camera/image_raw 话题。
练习 9.4:编写 diff_drive_controller YAML 配置文件,配置 wheel_separation 和 wheel_radius。
练习 9.5:发布 /cmd_vel 指令控制机器人运动:ros2 topic pub /cmd_vel geometry_msgs/msg/Twist "{linear: {x: 0.2}, angular: {z: 0.5}}"
练习 9.6:在 RViz2 中订阅 /scan 和 /camera/image_raw,观察传感器数据。
仿真结合实例(当前仓库):ISCAS Museum Gazebo 传感器与底盘控制
目标与知识点对应
本实例使用独立的 sim_demo,完整验证 Gazebo 世界加载、机器人 spawn、ROS-Gazebo Bridge、LiDAR/相机数据和 /cmd_vel 底盘控制,替代旧的 Gazebo Classic 示例命令。
运行步骤
source /opt/gz_ros2_control_ws/install/setup.bash
source /workspace/install/setup.bash

# 终端 1:启动 Gazebo、机器人、桥接和 RViz
ros2 launch sim_demo sim_bringup.launch.py \
  world:="$(ros2 pkg prefix sim_demo)/share/sim_demo/worlds/museum.sdf" \
  gui:=true rviz:=true sensor_profile:=teacher
# 终端 2:检查桥接数据
source /workspace/install/setup.bash
ros2 topic echo /clock --once
ros2 topic info /scan
ros2 topic echo /camera/camera_info --once
ros2 topic echo /odom --once# 终端 3:发送短时速度指令并观察里程计
ros2 topic pub --rate 5 /cmd_vel geometry_msgs/msg/Twist \
"{linear: {x: 0.15}, angular: {z: 0.0}}"观察结果
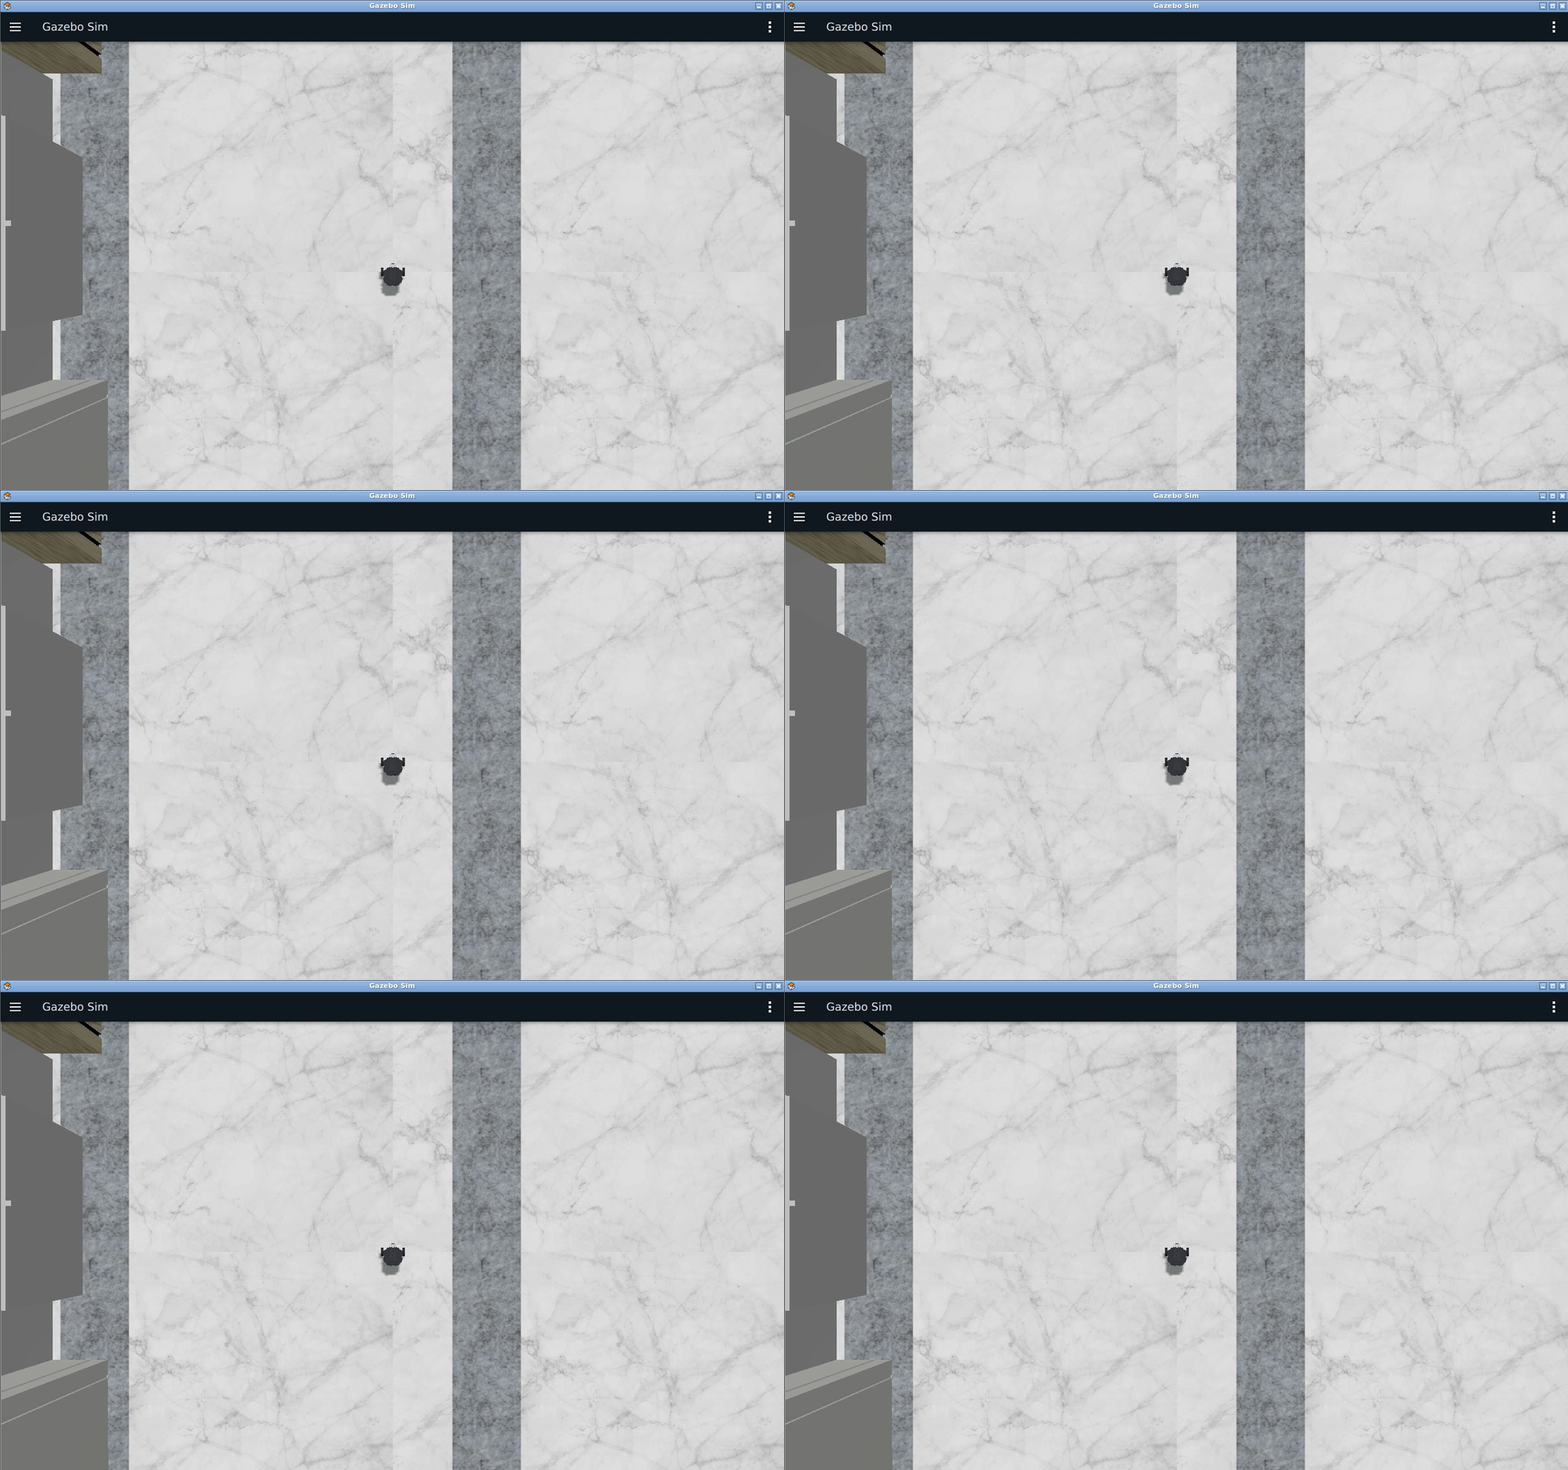
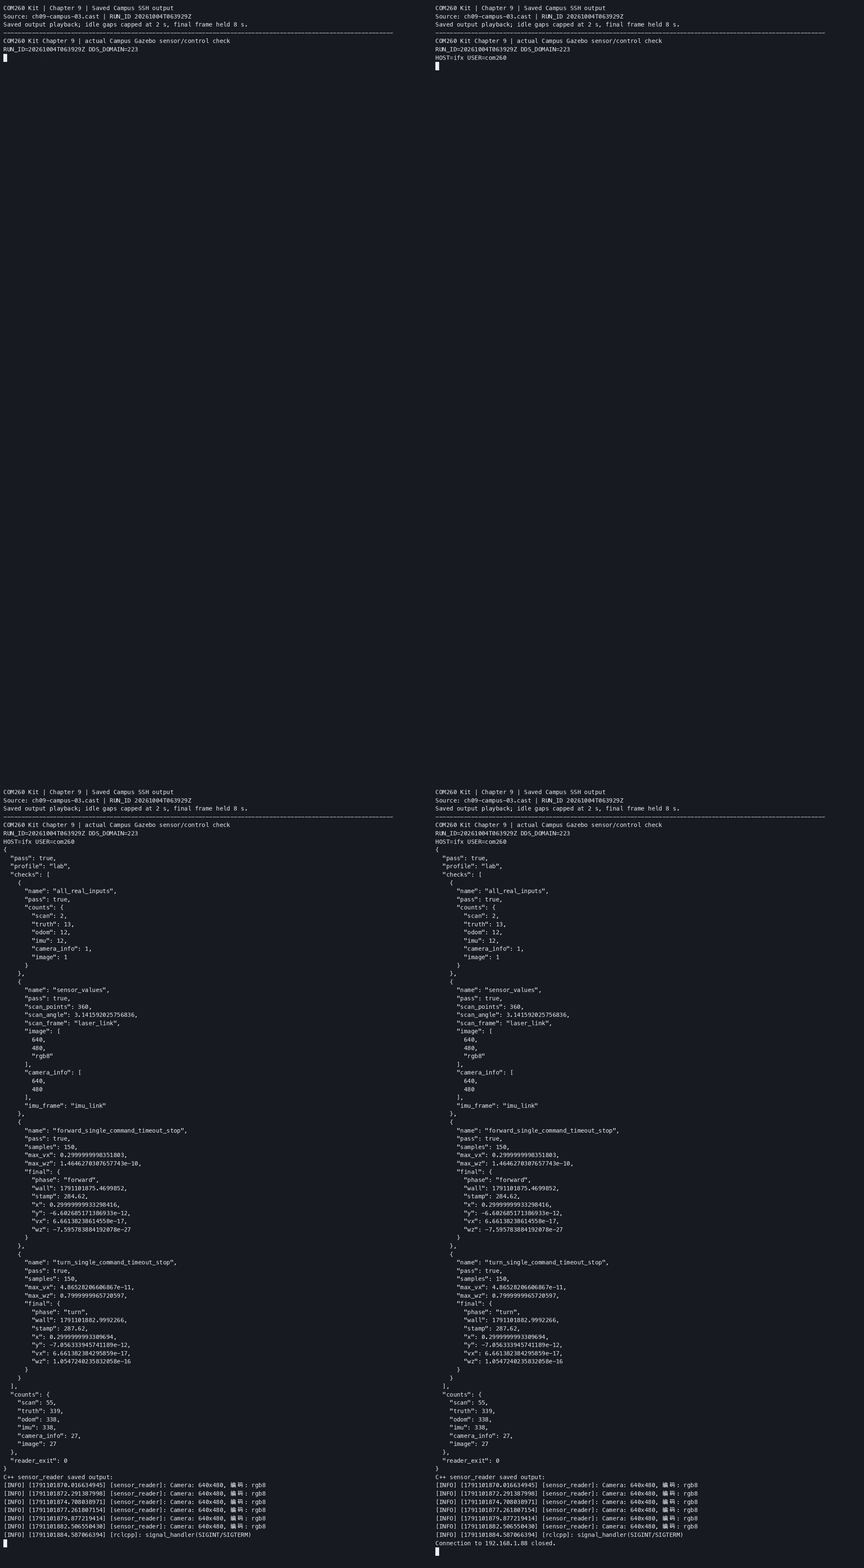
Gazebo 中加载 ISCAS Museum 场景并生成 TurtleBot3 Burger,RViz 可显示 RobotModel、TF 和 LaserScan;/clock、/scan 由 ros_gz_bridge 转成 ROS 2 消息,/odom 由 diff_drive_controller 根据轮反馈发布,发布 /cmd_vel 后可在 /odom 观察运动变化;关闭终端 3 的发布命令后,在 cmd_vel_timeout=1.0 秒后由控制器停止,需同时观察 /odom 反馈接近零。
源码与运行证据
Launch、模型、Bridge 和控制器配置位于 src_k3_com260_kit/sim_demo/;本章 C++ sensor_reader 在 COM260 订阅真实仿真数据。完整命令、双端分工及本轮结果见第 9 章实验和运行证据。
学习材料:
- ROS 2 Documentation (Humble) —— Gazebo Simulator 教程:https://docs.ros.org/en/humble/Tutorials/Advanced/Simulators/Gazebo-Simulator.html
- Gazebo 官方文档:https://gazebosim.org/docs
- gazebo_ros_pkgs(Gazebo Classic 与 ROS 2 集成):https://github.com/ros-simulation/gazebo_ros_pkgs
- gz_ros2_control(Gazebo 与 ros2_control 集成):https://github.com/ros-controls/gz_ros2_control
- ros2_control 官方文档:https://control.ros.org/
- The Construct —— ROS 2 Basics in 5 Days:https://www.theconstructsim.com/
- Articulated Robotics —— Gazebo / Simulation 系列视频:https://www.youtube.com/@ArticulatedRobotics